(Disclaimer : After 4 years I just found the macro button on my camera. I am super excited and will probably start doing a lot more "how to's" )
We all know how to make a pair of jean shorts - simple, mark where you want the leg to end and then whop away at the fabric with your scissors. After a couple of washes you'll have yourself one fine pair of daisy dukes.
I am 99.9% positive that I will never have to legs to pull a pair of shorts like that off. I hate shorts. I realized that this is true this morning when I looked in my closet to find myself a pair. All I had were a pair of maternity jean shorts and a pair of cargo khaki shorts. . . oh, and like 3 pairs of biking shorts ;) What I do have are lots and lots of jeans - most of my jeans are pretty beat up and the width around the ankles is a little out of date, so I decided to get to work.
I like that long skinny shorts are in right now, I like this because I do not have a pair of pants that is baggy through the thigh area . . . not even when wide legs jeans were cool did I have a pair of pants that were baggy through the thighs - it's just not in the books for me.
One thing that I detest more than just about anything else are pants (or shorts) that you can tell have been hemmed at home. I am a hem snob, so just shoot me. I've totally put my foot in my mouth over this issue several times, "Caitlyn, my mom hemmed these jeans for me, can you not stand these?" : / Actually no, I can't stand them. You should have let me hem them for you.
Getting the hem on a pair of jeans to look right is simple - follow the following rules:
1. Pick the same color of thread as the original hem and use a double thread if necessary to achieve the same look.
2. Put the same size hem in that was there before.
3. If you jeans are distressed and hem has a lot of details on it that you paid a lot of money for, then cut off the original hem and sew it back on. Honestly, this approach is easier than re-hemming a pair of jeans in my book and I do not know why alterations places charge more for it.
4. Most jeans have been through some sort of acid bath and then are industrially dried before you get them - this makes the hem have a very unique "worn" look to them - you can recreate this with a hot iron, lots of steam and some sand paper. After a wash or two in your home machine your hem will look as good as "old."
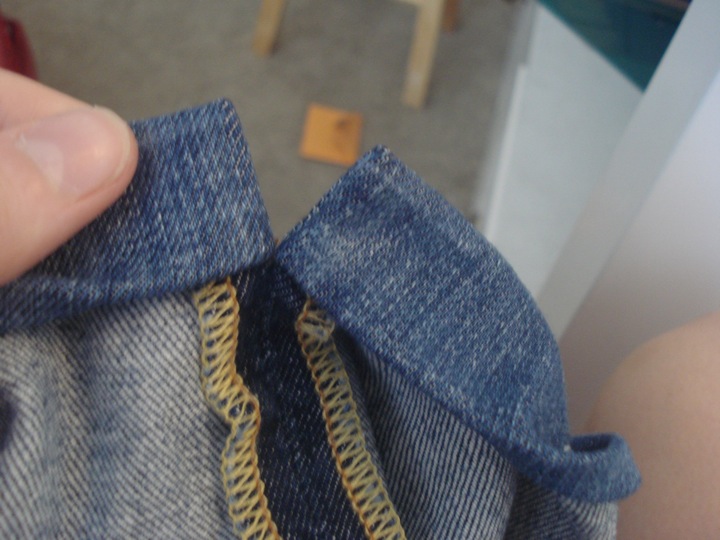
5. Keep in mind the shape of the leg when you are hemming something. When hemming a pair of jeans into shorts you are most likely going to be working with a tapered leg, meaning it gets increasingly narrow as you near the knee. When you fold the jeans up to create a new hem, you are going to get puckers in your hem unless you do something to your side seam first. The reason for this is because you are sewing something that is say 20" in circumference, to something that is 19 1/2" in circumference - it might not seem like a lot, but, it will look funny if you don't do something about it. There are a couple of ways to fix this, I have a picture demo below (with a few words) to show you one of the ways.
How to make a pair of shorts out of jeans : adding a side slit
(Yes, I understand that most of my readers probably know how to do this - especially you, Mom!)

1. Using a straight pin, mark where you would like the hem to end. Caitlyn's helpful hint: Forget where you think you want them to end and just pick the smallest part of thigh above the knee. If however you cannot hold a child in your lap because the space between your legs is so wide then I suggest just making daisy dukes. . .

2. Using a straight edge, chalk mark your hem line.

3. Your chalk line should run parallel to the crosswise grain line of your pants - look for threads running horizontally across your pants. Further, the chalk line should end at your side seams in the closest you can get to a 90 degree angle.

4. Decide how deep you want you hem to be (Do you want the stitching line to be 1/2" from the bottom? 1"? ), add half and inch to that measurement and then measure down that distance from your hemline. I wanted a 1" hem, so I added 1 1/2" to my hemline. Cut on this line.

5. Lay the cut leg over the leg that you have not cut yet. Make sure that everything is lying nice and flat and perfectly on top of one another - cut the second leg.

6. Get a seam ripper and tear out the outer side seam until you reach your stitch line. To determine where your stitch line will be, measure up from your hemline (first line marked) the depth of your hem (mine was 1" up from my hemline.).


7. Place a straight pin at the bottom of your side seam and sew ~ 1/2" up the side seam. Make sure you backstitch at the beginning and end of the seam (and trim your threads of course!) .

8. Press hem up 1/4" I am using a hem gauge to help me with this.

9. Press up another 1/4" This will hide your raw edge.

10. Press side seams flat

11. Fold bottom of hem up. It should fold right on that first hemline that you marked. Right sides will be together.

12. Bottom of hem will fold up until it touches the area on your side seam that you reinforced in step 7

13. Do the same thing to the other side and pin in place.

14. With the majority of the jeans facing away from you, sew the side seams shut - starting at the center and working your way to the hem. You can only do one section of side seam at a time. Backstitch at the beginning and end.

15. Now with the majority of the jeans facing you, start at the hem and stitch to the center along the side seam. Stop when you reach the midway point / stitch line from step 14. Backstitch at the beginning and end.

16. Clip your corners.

17. Turn hem right side out. Iron flat.

18. Continue ironing the hem up at 1" from the bottom to the folded edge.

19. Put a new large needle into your machine. There are needles specifically for jeans. . . I find a 90/14 works just as well.

20. Sew your hem in at slightly less than 1". I usually follow the 1" mark and then offset my needle to the right just a bit.
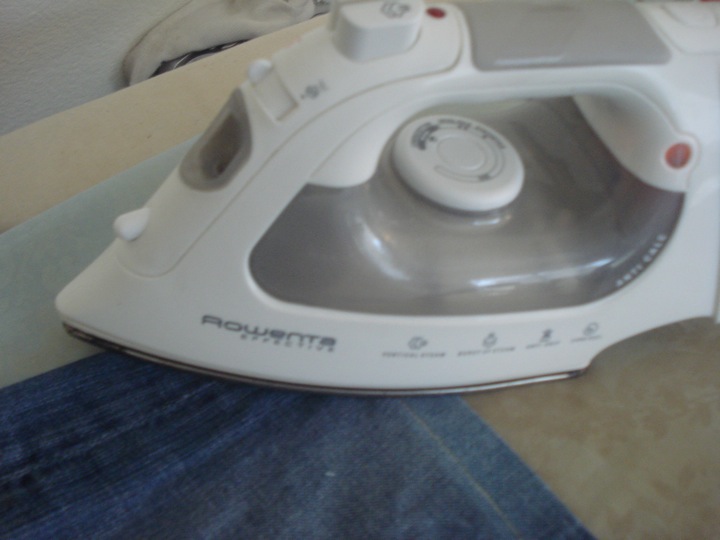
21. Iron that baby like there is no tomorrow. Turn your steam all the way up and leave your iron on the hem for a minute or so.

22. Pretty quickly you will notice that folds from your hem are starting to show through where you have been ironing. More steam and heat will bring them out even more.

23. Sanding block and very rough sanding paper.

24. Use the sanding block all over the hem. Little bits of lint will start to fall off and attach themselves to the sanding block. Caitlyn's helpful hint: Do not inhale or attempt to snort these - doing so will eventually result in cotton lung.

25. Use the rough sanding paper to add small holes to the very bottom of them hem. Remember these are shorts, the bottom edge really can't get that worn out naturally, so don't add to many holes or it will start looking unnatural. If you want to add a bunch of holes, add them to the back, that place would get more wear and tear for sitting than the front would. . .

26. These holes will distress a bit further in the washer. Better to make small ones than large ones that you can't go back on.

27. Viola! A cute little side slit in your denim shorts! A nice little detail that masks the fact that these were not originally shorts, but pants!

28. See what I mean? Short cut offs and me just would not work.
Let me know if there is anything else you would like a demo on. Make it as complicated as you'd like :)

